
Everybody’s got a little light, under the sun. – Parliament
For weeks I have been intending to buy a gooseneck lamp. My apartment, though wonderful in other ways, has possibly the dimmest lighting of any dwelling I’ve ever set foot in. Which is fine for general living (and who wants to live in a workshop or operating theater anyway?), but not for taking apart tiny electronics and soldering them, which I’ve been doing rather a lot of lately. So I keep meaning to buy a gooseneck lamp, but haven’t had the chance to actually do it.
Enter the flashlight assignment – I figured why not make a portable, flexible lamp that could double as a flashlight? Two birds, one stone, and no more strained eyes, stripped nano-screws and burnt components.
A couple of years ago, I made a lamp for another project, a clear-resin cast of an ostrich egg with an embedded LED array made from strips of heavy copper foil with LEDs soldered across them.

I really liked how visible the electronics were – not wires hidden in manufactured cases, but raw copper and blobs of solder, right out in the open. I decided to build on that framework for my lamp/flashlight.
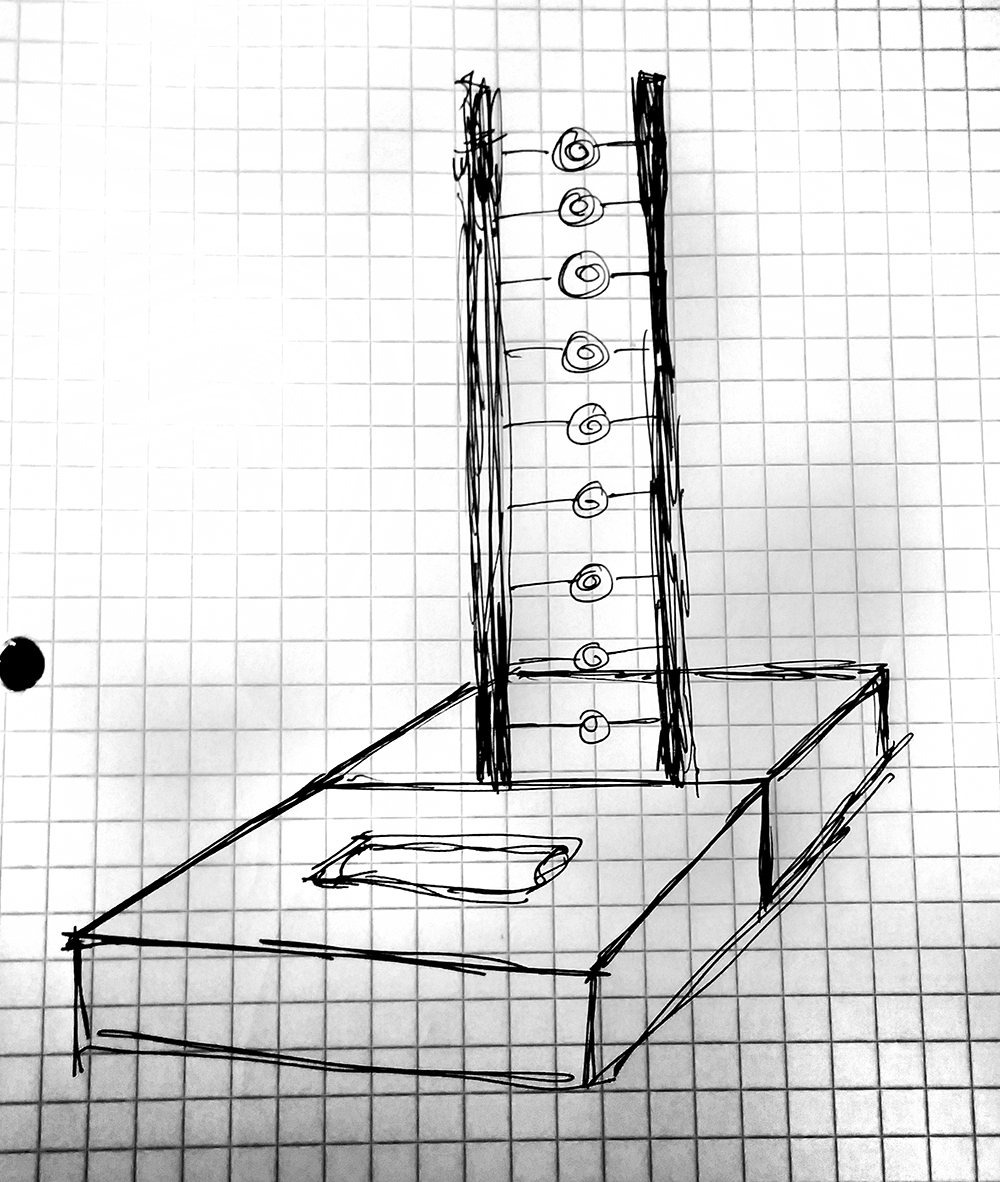
My initial thought was to build something like this – two wooden “feet” with the lighting element sandwiched in between. I would use a single lithium-ion battery, which yields twice the voltage of a normal disposable or rechargeable cell, and so incorporate the battery prominently into the design.
As luck would have it, I had to go up to Massachusetts to see my family this weekend. My stepfather is almost single-handedly renovating his and my mother’s house, and has a full wood shop and piles of excellent wood scraps, as well as lots of good advice and guidance.
I began by shearing some strips of the heavy copper foil I had used to make the egg lamp. I quickly realized that they weren’t quite heavy enough to stand up on their own, but folded in half lengthwise, they became quite sturdy. They also became a little lumpy, but I kind of liked the rustic look. It fit in well with my concepts for this project, such as they were – utility, visible functionality, and making good use of what was at hand.
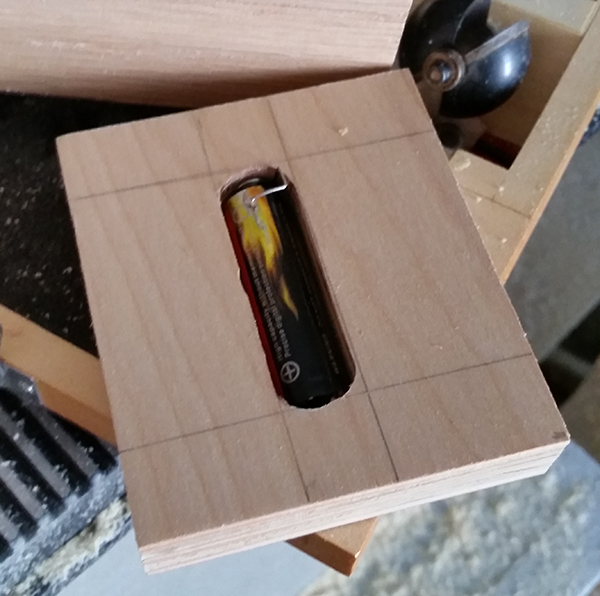
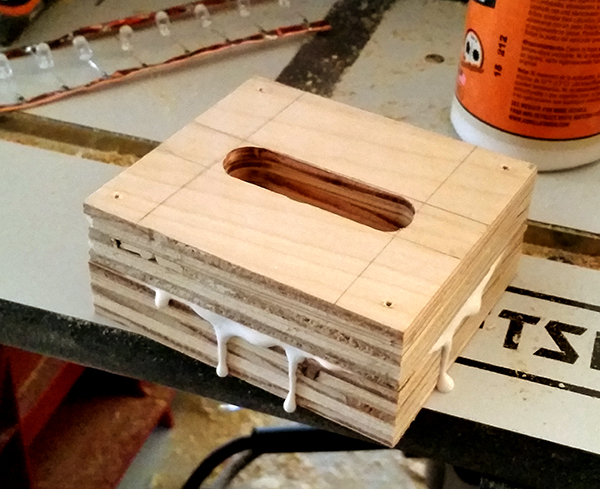
Next, I found a couple of nice small offcuts of maple plywood, matched in size, to make the base. My stepfather showed me how to use the router to carve out a channel for the battery, and I harvested a negative-terminal spring from an old Walkman I’ve been using for another project. 
Then it was time to make the actual light. I had been agonizing a little bit over how to run the LEDs. Technically, one is never supposed to put multiple LEDs in parallel without each having its own resistor, since it’s possible that one diode could end up running all the current through itself and burning out. In practice I’ve never seen this happen, but I figured it was perhaps best to do it the right way.
The only trouble there is that resistors seem to come in one size that is easy enough to solder to a wire or sheet but is too big to work aesthetically, and another that is petite and svelte but has no wires and is only really meant to be used on circuit boards. I chose the latter (I had a bunch of both on hand from the egg), and used masking tape to line them up to the foil as best I could. Not a precise process at all, and things became, er, a little more rustic…

After I soldered both sides as best I could, it was time to build the actual lamp. My stepdad had a box of very nice-looking copper nails, which I thought would work well with the other copper, and could serve both as a structural element and an electronic one. I decided, rather than have the base spread out with the lighting tower in between, to stack the two pieces of wood and nail the light to the back. I could then nail in the terminals for the positive and negative connection (as well as a raw-canvas “ribbon” to lift the battery out) and run thin wires around the corresponding nails to transmit power. I also drilled pilot holes (at my stepfather’s suggestion), and nailed the two pieces of wood together to secure them after gluing.
When I got back to Brooklyn, I finished assembling the lamp, nailed in the electronics and ran the wires.

I also added dots of hot glue over the solder joints, which were very fragile, especially at the tiny resistors. Not my first choice for aesthetics, but having the glue take the mechanical stress allowed me to bend the lamp much more freely, which was, after all, the point of making it in the first place.


All in all, I’m fairly pleased with it. It’s definitely rough in places that I wish weren’t quite so rough, but it’s handsome, and, more importantly, useful.
One response to “Flashlight!”